Movin’ On Up

I’ve done it! I’ve finally done it! I have been trying to be patient, even though it’s been on my mind to do for quite a while, but I have finally moved my blog over to www.madebyjaime.com, a self-hosted wordpress blog!

Click on over to find out the details and how you could find the help you need if you’d like to do the same!

JaimeSews moves to WordPress.org!

And if you subscribe to this blog by email or bloglovin, I will be moving the subscriptions over to the other site this week so you shouldn’t miss a thing!

So come on over and check out my new place! And let me know what you think!

Book Review: Sewing To Sell

I love to enter sewing giveaways. Back in 2008 when I first started blogging I won a Michael Miller fabric set and I was hooked! I’ve scarcely won anything since, but I recently hit the jackpot winning this book by Virginia Lindsay of Gingercake Designs. It’s called Sewing To Sell: The Beginner’s Guide to Starting a Craft Business.

Sewing To Sell | Review by JaimeSews

In many ways I’m not a beginner, but I’ve recently felt a little directionless. I feel somewhat stuck in between a hobby & a real business so I tried to sit down with this book with the eyes of a beginner to see if I could find some direction one way or another. I was not disappointed with Virginia’s smart & practical advice!

I sometimes find my head spinning from all the opportunities presented by the crafty business world. There is so much variety and so many possibilities and paths one could walk down. Right off the bat, Virginia encourages readers to stick with their own personal style. This may seem obvious, but it’s easy to get so inspired by everything around me that I feel I need to mimic what I see, instead of being true to myself. I can see some definite growth in this area since I started sewing to sell in 2008 after the birth of my son. I wasn’t choosing fabrics that inspired me in an effort to keep costs down and found myself unhappy very quickly. After I went back to work full time, I set the sewing business aside until the last year or so and this time I’ve endeavored to sew what I love.

In another section, Virginia discusses some business tips including changing the way you look at purchasing fabric & supplies. I definitely related to her examples and confessions and plan to make changes in this area myself. Other topics discussed (and shown beautifully) are how to photograph and package your product and for online and craft fair sales. Sewing to Sell also discusses pricing your product, organizing your patterns and sewing space and explains how to identify your customer.

Sewing To Sell | Review by JaimeSews

And then, to top it all off, there are 16 Starter project patterns included to get you started in your own sewing business. I confess, in a world with Pinterest and unlimited web resources, I hardly ever buy a book for projects anymore. But there was not one project in this book I wouldn’t want to make and many of them are a blank slate with which Virginia encourages the reader to make their own! And super extra bonus?!?! There’s a price range suggestion included at the top of each project pattern!

Sewing To Sell | Review by JaimeSews

Overall I found the advice in this book was exactly what I needed to hear. I should have known that when I felt lost, it would be best to follow the advice of Vince Lombardi and go back to the basics. So if you are a new to the craft business, save yourself some trouble and grab a copy of this book. And if you are a seasoned craft business owner looking for a little direction, you should also grab a copy of this book and remind yourself about the basics of Sewing to Sell!

Thank you so much to Virginia of Gingercake Designs for generously offering Sewing to Sell as a prize and thank you for supporting the handmade community with your practical, straight forward advice! I know I will be using the patterns included to add cute new products to my etsy shop this coming year!

Handmade Christmas Pajamas

Hi! Thanks for stopping by my blog as a part of the Ruffle Pajamas Tour by Once Upon A Sewing Machine!! I’d love to get to know you and keep in touch so don’t be afraid to leave a comment or chat with me on facebook, twitter and/or instagram!

Traditions are a great way to celebrate the holidays. When I was little, my grandma always put a swimsuit in our Easter Baskets and I know many people give PJs on Christmas Eve. The Ruffled PJs pattern, available in sizes 12 months through size 6, is a great choice for continuing or starting this tradition!!

Ruffle PJs Pattern by Once Upon A Sewing Machine | JaimeSews

When the kids and I went to F&M Fabrics (online at TheFabricMarket.com) to look for flannel to make these PJs, the choice was made for us as soon as we saw this adorable camping animals print. A helpful employee pointed out this cute pink coordinate, which we thought would be perfect for the small bodice ruffle and the pant cuffs. (Side Note: My daughter is 3 and consequently is going through a phase where she MUST have her sleeves rolled up and don’t even mention the word elastic. Hence, our sleeves have no elastic and they are rolled up. The original pattern design has cute elastic gathered sleeve hems)

Ruffle PJs Pattern by Once Upon A Sewing Machine | JaimeSews

My daughter’s measurements landed right on the 3T in the chart provided in the pattern so that is what I cut, even though I was worried it might be too small. The top is very roomy, as described in the pattern description, “for movement and twirl” so every little girl will love that. I wish the pants were a smidge longer but they fit perfectly otherwise. To make room for the cuff option in size 3T, I was instructed to cut 3″ off the pant leg so next time I may just cut 1 or 2″ instead.

Ruffle PJs Pattern by Once Upon A Sewing Machine | JaimeSews

The instructions were clear with photos to illustrate each step. The only thing I did differently was use the cuff to, in essence, hem the pants (maybe this affected the length somehow?). Let me show you what I mean.

First I sewed the side seams and the inseam of the pants.

Ruffle PJs Pattern by Once Upon A Sewing Machine | JaimeSews

Then I sewed the cuff pieces together at the side seams (the instructions recommend sewing each one to the pant leg before assembling the pants).

Ruffle PJs Pattern by Once Upon A Sewing Machine | JaimeSews

I pressed the tubes in half, wrong sides together.

Ruffle PJs Pattern by Once Upon A Sewing Machine | JaimeSews

And placed them on the pant leg, lining up the raw edges of both pieces.

Ruffle PJs Pattern by Once Upon A Sewing Machine | JaimeSews

Then I sewed, serged and pressed the cuff down. There we go – no additional hemming!

Ruffle PJs Pattern by Once Upon A Sewing Machine | JaimeSews

The Ruffled PJs Pattern is on sale for just $5 this week!

Ruffle PJs Pattern by Once Upon A Sewing Machine | JaimeSews

So go get your copy and don’t forget to check out the other stops along the blog tour! (just click each name below)

Image Map

Black Friday Through Cyber Monday Sale!!

Hey all – I hope you had a great day yesterday with family & friends and that the joy and gratitude remain throughout the season! I wanted to let you know about a sale I’m running today through midnight (PST) Cyber Monday  in BOTH my shops!

JaimeSews Black Friday - Cyber Monday Sale!

So head on over to www.jaimesews.etsy.com or www.jjssupply.etsy.com and please share & tell a friend!

Omni Family Tour – JaimeSews

Today’s The Day!! It’s my turn to share with you my version of the Omni Tempore pattern for both kids and adults! I’m Jaime, found on twitter, facebook and instagram as JaimeSews. I’ve been sewing since I was 15 years old, earned a bachelors degree in Home Economics, worked selling sewing machines, in a quilt shop and later in a bridal shop & now sew from my home. I’m so glad you’ve stopped by!!
Omni Tempore Pattern by Sofilantjes | JaimeSews
I’ve been busy making up some fall/winter staples for me and the kids with the Omni Tempore Pattern by Sofilantjes and I have TWO techniques to share with you!
  • How to adjust for using a not-so-stretchy knit with a pattern designed for knits and
  • How to create basic machine appliques to make your Omni Tempore your own!

BUT – You should know – there is a sale on The Omni Tempore pattern bundle all this week during the tour AND there’s a giveaway! (And if you so happen to purchase the pattern and then win it, you will be refunded so be sure to keep your receipt/email!)

Prize Pack #1

1.5 meters of fabric from Joy Fits Fabrics

Omni Tempore Pattern Bundle by Sofliantjes

Bustle Skirt Pattern by Koda Baby Boutique

1 Pattern of choice by Filles a Maman

1 Pattern of choice by Serger Pepper

1 Pattern of choice by E+M Patterns

1 Pattern of choice by Striped Swallow Designs

Omni Family Tour | JaimeSews

Prize Pack #2

1.5 merers of fabric from Joy Fits Fabrics

Omni Tempore Pattern Bundle by Sofilantjes

Grace Pattern by Rose & Lee Designs

1 Pattern of choice by Filles a Maman

1 Pattern of choice by Madeit Patterns

1 Pattern of choice by Dandelions n’ Dungarees

So be sure to read/scroll to the end of the post to enter!

Let’s get started!

All three of us got our fabric from F&M Fabrics locally, found online at thefabricmarket.com. They have the best prices hands down and a huge selection. As we walked down the aisle lined with the knits, the kids saw/felt/hugged/laid their heads down on this super fuzzy, exquisitely soft fleece.
Omni Tempore Pattern by Sofilantjes | JaimeSews
If you’ve ever been shopping with your kids at the fabric store, you know it can be a challenge to focus. Well, we all fell in love with how unbelievably soft the fabric was that I completely disregarded that the pattern calls for knits.
Omni Tempore Pattern by Sofilantjes | JaimeSews
Now Fleece is technically a knit, but 1) it’s bulky and 2) it’s not that stretchy. So I had to improvise. First (in order of discovery), I had to cut the collar lining from a much thinner knit in order to reduce bulk. I also ended up cutting about 1/2″ off the neckline all the way around to widen it enough for their little heads to fit through.
Omni Tempore Pattern by Sofilantjes | JaimeSews
After I got the collar attached, I realized there would also need to be some more room in the body and sleeve to compensate for the lack of stretch. I took the same knit I lined the collar with and made a gusset all the way down from the wrist to the shirt hem. I really loved how this added a pop of color to each top!
Omni Tempore Pattern by Sofilantjes | JaimeSews
This particular problem could also be solved by choosing a size or two up. The Omni Tempore pattern has unlimited options, including different sleeve lengths, sleeve/waistline ribbing or regular hem, kangaroo pocket, collar or hood! I let the kids each pick out their own style features and since they chose the collar I thought it’d be fun to choose the hood for myself.
Omni Tempore Pattern by Sofilantjes | JaimeSews
What I love about the hood is that it also looks like the cowl neckline the kids have, so especially in the fabric I chose, it still looks dressy. But…it DOES have a hood!
Omni Tempore Pattern by Sofilantjes | JaimeSews
This knit I found at F&M Fabrics is a super soft, sheer knit, great for fall & part of winter here in CA.
Omni Tempore Pattern by Sofilantjes | JaimeSews
Regarding the Omni Tempore pattern, it was a super quick sew! Even with all the options, I found it easy to make three different variations without consulting the instructions much after making just one. The instructions were clear and the pattern pieces all fit together without a hitch. It was a thoroughly enjoyable sew!
Omni Tempore Pattern by Sofilantjes | JaimeSews
So let’s get on to how to add the applique!
Applique Tutorial | JaimeSews
First you need to gather all your supplies:
  1. Scissors
  2. A pencil/pen
  3. Pellon 805 Wonder-Under
  4. Fabric to applique
  5. Your applique design. I just found the images I wanted to use on the interwebs and printed them out.
Applique Tutorial | JaimeSews
Trace the applique design onto the paper side of your Wonder-Under.
Applique Tutorial | JaimeSews
Rough cut around the applique design you just traced onto your Wonder-Under and place it on the wrong side of your applique fabric. Press a few seconds to tack in place.
Applique Tutorial | JaimeSews
Allow it all to cool completely. Cut out the traced design.
Applique Tutorial | JaimeSews
Peel off the backing of your applique, making sure the webbing is attached to your fabric.
Applique Tutorial | JaimeSews
Place on your shirt where you want it to be…
Applique Tutorial | JaimeSews
Then fuse in place using a damp pressing cloth (or fat quarter sized muslin/cotton scrap) until the press cloth is dry. (See also the directions that come with your Wonder-Under). Stitch in place with a zig zag stitch.
Applique Tutorial | JaimeSews
The Omni Tempore is a great pattern for the whole family that doesn’t have to look matchy-matchy, but could if that’s what you’re going for! Thanks for stopping by and be sure to enter to win one of the amazing prize packs!

Click Here To Enter —-> a Rafflecopter giveaway

And don’t forget to head on over to the other stops on the tour!

Monday, November 24th
Tuesday, November 25th
Wednesday, November 26th
Thursday, November 27th
Friday, November 28th
Saturday, November 29th

Omni Tempore Blog Tour & Giveaway

Omni Family Tour | JaimeSews

I’m so excited to be a part of the Omni Tempore Pattern Tour this week, with my post going live tomorrow morning! I had a lot of fun making tops for myself and my kids and have a few pointers for you on using this pattern, designed for knits, with fleece! Can’t wait to show you our versions, but be sure to head over to today’s tour stops to enjoy everyone’s creativity with this versatile pattern!

Monday, November 24th
Tuesday, November 25th
Wednesday, November 26th
Thursday, November 27th
Friday, November 28th
Saturday, November 29th


And – Oh, Hey! There’s a giveaway too! You could win one of two amazing prize packs! 

 Prize Pack #1

1.5 meters of fabric from Joy Fits Fabrics

Omni Tempore Pattern Bundle by Sofliantjes

Bustle Skirt Pattern by Koda Baby Boutique

1 Pattern of choice by Filles a Maman

1 Pattern of choice by Serger Pepper

1 Pattern of choice by E+M Patterns

1 Pattern of choice by Striped Swallow Designs

Omni Family Tour | JaimeSews

Prize Pack #2

1.5 merers of fabric from Joy Fits Fabrics

Omni Tempore Pattern Bundle by Sofilantjes

Grace Pattern by Rose & Lee Designs

1 Pattern of choice by Filles a Maman

1 Pattern of choice by Madeit Patterns

1 Pattern of choice by Dandelions n’ Dungarees

Click Here To Enter —–> a Rafflecopter giveaway

Additionally, during this blogtour both Omni Tempore patterns and the Bundle will be on SALE!

And as a bonus, if you buy one or both of the Omni Tempore patterns and win the GIVE AWAY, you get to pick one or two other patterns from the store! (So hold on to you e-mail/ payment receipt just in case!)

So have fun checking everything out and I’ll see you tomorrow!

30 Minute Christmas Coasters by The Nosy Pepper

Hello JaimeSews readers!  I’m Cyndi and I blog over at The Nosy Pepper, I’m super excited to show you a super quick and easy scrap friendly project that is perfect for Christmas. When Jaime asked me to guest post a Christmas post, I was a bit nervous, as I’m mostly a bag sewer.   Since I realize that few people are going to want a Holiday themed bag, I decided to do something much quicker and easier. So, in comes the 30 minute Christmas Coasters! These are so simple to make and use such little fabric, you could make several sets in no time.I think I’m going to make several more to have on hand for all those last minute gifts you end up needing.

Materials:
1/4 yard (or less) of felt
Fat quarter of quilting weight cotton (you can get more than 4 coasters out of 1 FQ, or you can use scraps to mix and match!)
Contrasting thread (I used a gold thread but any contrasting will do)
Pinking Shears
Embroidery scissors or other small scissors
Water soluble pen or Frixion Pen
Find a round object that is slightly larger than the finished size you like ( I had a bowl that was about 5 inches in diameter that was perfect). Trace 6 circles from the felt and 4 from the fabric.
There are two different types of coasters,the first kind, I just put the fabric against the felt (wrong sides facing) and stitched around the circumference of the circle using a 1/2″ seam. Then, simply stitch in a zig zag fashion to make the shape of a tree. Lastly, use your pinking shears to trim your seam allowance around the circle to 1/4″. Easy Peasy! For all you quilters out there, you could do any design, stockings, ornaments, santa hats etc.

For the second kind (and my favorite). You will need 2 pieces of felt and 1 piece of fabric. Put your fabric and felt together like before, with wrong sides facing. Next take a 2nd piece of felt an draw a design that will give you plenty of space to cut around (I chose a star, but you could make an ornament, or a stocking if you like). Place that piece of felt on top of the cotton (you should have one piece on top of the felt and one on the bottom). Stitch around the circle with a 1/2″ seam allowance and then stitch directly on stop of the design you just drew.

With a seam ripper carefully (very carefully…you only want to cut the felt on top and not into the fabric beneath it) make a rip in the felt then use your scissors to cut as close to the stitches as you can.

Then like before, take your pinking shears and trim the seam allowance to 1/4″. That’s it! You can mix and match both styles like I did, or just pick your favorite!

Thanks so much for having me Jaime! I had so much fun making these!

A Rival Quilt – Dodgers vs. Giants

Friends, some things are learned and some things you’re just born with. Even though I do not watch a single game during baseball season, I was born a Dodger fan and that’s not something that’s easily abandoned. I love sports, I really do. I’m the kind of girl who will walk into a gathering where the game is being watched (football, baseball, basketball, it doesn’t really matter), and will have a great time choosing a team randomly to be really passionate about for the duration of the game. Then I can walk away and never know anything about them ever again. It’s so fun.

But my cousin is the REAL Dodgers fan. He watches the games, knows the players, the stats and everything. Then he went out…and married…A GIANTS FAN!! You can imagine how devastating this would be if we didn’t truly love her and feel that he indeed married up. At their wedding, Jason & Eleanor entered their reception party through a tunnel of baseball bats, the groomsmen holding Dodgers bats and the bridesmaids holding giants bats. So now that they’ve had their first baby boy, we had to continue the theme.

Dodger-Giant Quilt | JaimeSews

Last week I finished and sent off this Dodgers and Giants themed quilt for their new little bundle of joy. It may seem subtle and unassuming from the front, but the back tells no lies. Dodger-Giant Quilt | JaimeSews

I was so excited to find these amazing matching MLB Fleece Prints at F&M Fabrics and pieced them together to make the back. Of course the Dodgers print had to be on top 😉 Though I don’t follow baseball, I am fully aware that the Giants just won the world series, but, I mean, pffft.
Dodger-Giant Quilt | JaimeSews

I did a simple meander stitch for the quilting and used the fabric from the squares to make a scrappy binding, cause choosing a color one way or the other on this quilt just didn’t seam right.Dodger-Giant Quilt | JaimeSews

Even though the baseball print is a little busy as the border, the woman cutting fabric and I agreed it added to the theme so I went with it.

I hope their little boy loves it for years to come! And I can’t wait to see which team he sides with when he’s old enough to choose!!!

This quilt measures 40 x 60″ and is perfect for a baby quilt that will last or for a lap quilt. If you’d like instructions to make your own, please see my previous tutorial post!

It’s November!

In Central CA, it’s not uncommon for October and November to stride by without so much as a hint of fall – you know, cloudy days, rain, cold…? It’s been known to be 75 degrees and sunny on Thanksgiving! But my facebook feed was full of local friends gleefully welcoming the storm we had Friday night and the rain it brought with it. In our Valley, rain is desperately needed, not only to clear the air but to alleviate, even minutely, the drought we’re in. Thankfully the storm held off until trick-or-treating was done and we were all home in bed!

I know I showed you my daughter’s Super Girl Costume last time, but I was able to snap a few pictures of the two of us together as well as an updated picture of my husband in his home-sewn Anakin costume!

Halloween 2014 | JaimeSews

We went to a party at a friend’s house and had a great time. Miss E convinced me to don my cowgirl boots with my costume too – she wanted to match. Even without the vinyl boot covers and cuffs, I think everyone knew we were super girls. 🙂  And the kids were already wearing their costumes the next day and the day after, so we will get a lot of play out of these before they grow out of them.  (For details on the Super Girl costumes, click here). A big thanks to F&M Fabrics for their great selection of Satin and Tulle!Halloween 2014 | JaimeSews

The boys chose a Star Wars theme. Mr. T really wanted to be a Clone Trooper so my husband defaulted to his Anakin costume I made years ago before we had kids. There are details on the Anakin costume in my guest post at the Star Wars Wife blog!Halloween 2014 | JaimeSews

We had a great time and hope you did too!

Currently I’m working on some quilts I hope to show you in the next few weeks. One I have finished, and the other is in progress – just finished 4 rows yesterday!

Airplane Quilt | JaimeSews

After that I have some projects to finish for a few blog tours the end of November/beginning of December and a few things I’ve been wanting to sew for me, if I can fit them in. The holidays are upon us and this cool weather is just what I need to get me in the mood for some holiday sewing.

What are you working on?!

The Ballard Top Pattern by Straight Stitch Designs

Howdy and welcome to my stop on the Ballard Top Pattern Tour!

I “met” my friend Kimberly of Straight Stitch Designs in the Pattern Workshop* Facebook Group. As soon as I saw her there, it seemed I saw her everywhere! We found ourselves in the same tester groups and on the same pattern fan pages so it has been fun work alongside each other, long-distance-like. When she posted her first pattern tester call for the Ravenna, I was completely bummed because I was loaded down with other projects and couldn’t take advantage of earning this great pattern through testing it. It didn’t stop me from grabbing my own copy once it was published though!

Ravenna Top by Straight Stitch Designs

Kimberly Modeling the Ravenna Top – Click the picture to see more and to purchase the pattern!

Isn’t it beautiful?! It has a high low hem, exposed zipper back and optional ruffle along the back neckline. I can’t wait to make my own version. BUT – That’s not why we’re here! So let me get on to the Ballard Top!

The Ballard Top | JaimeSews

The Ballard Top (available exclusively through IndieSew for it’s first two weeks of release), is Straight Stitch Designs’ second pattern release, a tunic-length top designed for knits. Kimberly’s style has been describe as classic with a twist – and the Ballard is definitely that because…wait for it…here’s the back!

Ravenna Top by Straight Stitch Designs

The front is modest, comfy and easy to wear, but the back criss crosses in such a way so it opens up for a little sassy detail! So no worries about bending down to pick up kids or toys or schlepping groceries from the cart to the car…but no worries about looking like “frumpy mom” either! Gotta love that!

The Ballard Top goes together in no time! After printing out the pattern and taping it together, I easily graded between the nested sizes to get the right fit according to my measurements. I got this knit from F&M Fabrics, of course (online at thefabricmarket.com). The entire top can be made on your home sewing machine with a ball point/stretch needle and a narrow zigzag (or stretch straight stitch if your machine has one). No serger needed! Although you could certainly use one just as easily.

The Ballard Top | JaimeSews

I’m really excited for what Kimberly has up next – I got a sneak peak of the next pattern and she’s definitely a new designer you’ll want to follow! Also, check out the other tester versions of The Ballard Top in the rest of the blog tour.

Ballard Blog Tour | JaimeSews


*Affiliate Link

Halloween 2014

I have been working on Halloween Costumes all month and was so excited to finish this past Friday, just in time for our local Boo at the Zoo. This year my son broke my sewing heart when he asked for a store-bought costume instead of a handmade costume like we always do. To his credit, he didn’t actually dismiss a handmade costume. He just asked to be a clone trooper and that is definitely a territory I’m not willing to venture into the handmade way. But I had a ton of fun making Miss E’s Super Girl Costume and it kept me plenty busy! We used McCall’s 7001.

Because I’ve always found the Big pattern company patterns to be wide and short, I started off with a muslin. I cut her bodice size from some unbleached cotton and sewed it up without closures to test for fit. As I suspected, it was too wide, so I pinched out some vertical tucks in the pattern to adjust for the width and went to work on the real dress.

Super Girl Costume | JaimeSews

I got absolutely everything I needed from F&M Fabrics locally – but you can shop at their online shop from wherever you are! They have a great selection of satin and tulle, not to mention vinyl, notions & thread and the best prices around. You should see the vinyl boot covers and cuffs I made – the ones I stayed up late Friday night to finish so we could go to Boo at the Zoo…? Yeah, she wouldn’t wear them. She just got these cowgirl boots and won’t take them off or have them covered, so Super Cow Girl it is!

Halloween 2014 | JaimeSews

Boo at the Zoo is lots of fun! Besides the animals, there are lots of games and a playground.

Halloween 2014 | JaimeSews

My little storm trooper proved to be great protection against the scary dinosaurs on the train ride!

I made the costume just as instructed, except for the removable cape. The instructions asked me to make 3 thread eyes on the top of each shoulder seam. Then I needed to sew three hooks on the cape. I a) didn’t want to do that and b) wasn’t sure how it’d hold up. I briefly considered velcro, but was concerned it would get caught up on the tulle skirt in the wash. Then it occurred to me – KAM SNAPS!

Halloween 2014 | JaimeSews

So that’s what we did! And it worked perfectly.

Super Girl | JaimeSews

Those of you who follow my Instagram feed might be wondering where my matching costume is? Well for now, it’s all laid out in our bedroom until Friday Night. I wish I were better at Photoshop to make it look as epic as it feels every time I pass it – like a super hero displays their uniform in that glass structure…? It’s going to be fun. Watch that IG feed for the costume in action. 🙂

Super Mom | JaimeSews

There were a lot of components to these costumes this year – dress, shorts, cuffs, belt, cape, boot covers – the pattern even has pieces for a mask or star appliques on the skirt and it could easily be made into bat girl or any super hero for that matter. I love making costumes as you can choose fabrics that hold up or are more comfortable. For exacmple, I was able to line the satin bodice in cotton. I would love to see your costumes this year!! Please leave me pics or links in the comments below. Until next year, Happy Halloween!

Halloween 2014 | JaimeSews

*This Post may contain affiliate links*

MCM Studio Designs’ Estherlyn Jumper Tutorial

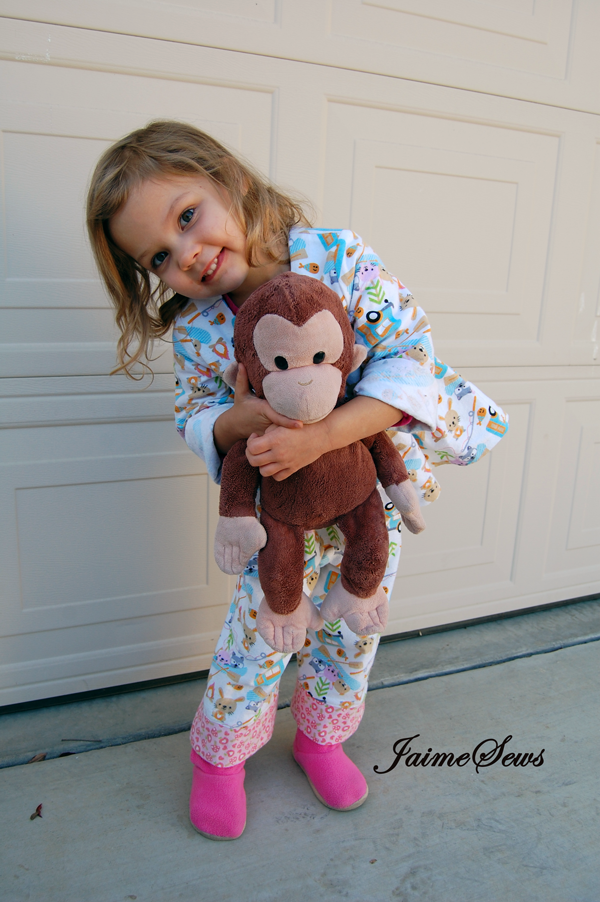
Today on the blog I’ve invited Linda Lehn of MCM Studio Designs to share a tutorial with you! Hint: She’ll show you an easy alternative for making ruffles! Take it away Linda!

Thank you so much, Jaime, for allowing me to write a guest post!  I am delighted and honored to be here.

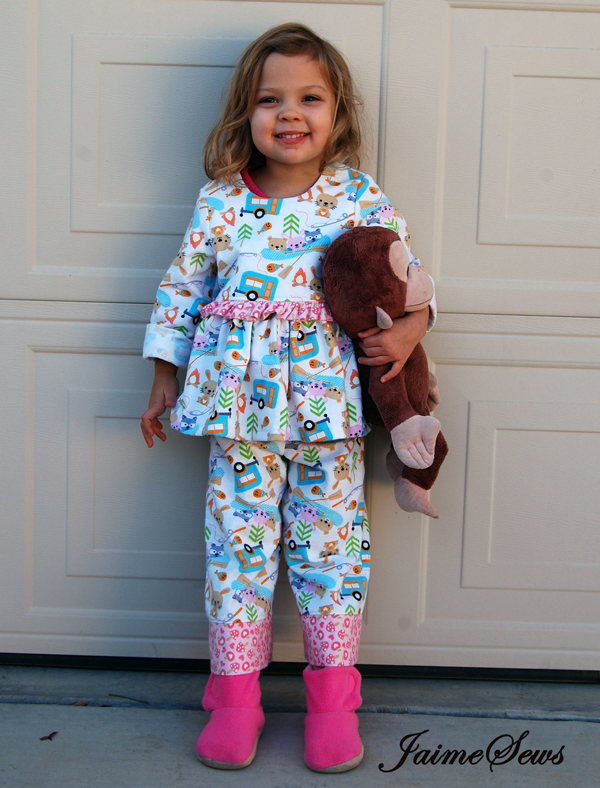
Today I am excited to share a tutorial for a modification that can be made to my Estherlyn’s Jumper pattern.  The pattern is available through Craftsy, my Big Cartel Shop and my Etsy Shop.

In this tutorial I will show you how to add ruffles to the front and hem of the jumper.
Thank you to Lily AnnaBella, Faith and Kristie Mason Photography for the modeled photos.
I have had this idea in my head ever since I first drew a sketch for this pattern.  I was really excited to get a chance to give it a go!
So here’s how you do it.
After cutting out the pattern, you will need to mark placement lines for the ruffles.
First make marks 3/4 inch (2 cm) above the bottom edge of the fabric at the center and side of the skirt piece. Do this with the skirt piece still folded in the center.

After that, to determine how far apart to draw your placement lines, measure from the mark at the center to the center top of the skirt piece.  Subtract 3/8 inch (1cm) for the seam allowance at the top.  This distance will vary with different sizes.

I decided that I wanted nine ruffles in between because I wanted my ruffles to be 2 1/2 inches (6.4 cm) wide. Nine ruffles that size gave me the closest to an even measurement that was slightly less than the 2 1/2 inches (6.4 cm).  This distance needs to be a slightly smaller width than the ruffle itself so that the ruffles will overlap.  It wasn’t exact, but it was close enough. It took a little calculating to get a measurement that was easy to work with.
Dividing that measurement by nine gave me approximately 2 1/8 inches (5.4 cm).
Take that measurement and measure up from the first line at the center and make a mark.  Do the same at the side edge of the skirt piece.  Continue making marks like this until you get to the top of the piece.  Once the right side done, flip it over and make marks along the other edge as well.
Use a design curve ruler and draw lines to join them.  Mark from the center to the righthand side.
Keep the marks on the design curve as close to 90 degrees at the center and side edges as possible.  Each row is slightly different.  You will need to move the ruler just a bit for each row.
Continue all the way up the front piece.
Flip it over and do the left hand side as well.  For the left hand side, the ruler will need to be flipped over as well.
You will also need to make a mark where the seam allowance will be on each side of the skirt pieces.  This will help you know where to begin and end gathering the ruffles.  Measure in 3/8 inch (1 cm) from the edge to place these marks.
At this point it is a good idea to finish the bottom edges of the front and back skirt pieces with a serger or other edge finishing method.
Cut the ruffles slightly wider than the measurement between the lines.  My lines were 2 1/8 inch (5.4 cm) apart, I cut the ruffles at 2 1/2 inches (6.4 cm).  The ruffles should be cut as width-of-fabric strips if you are using a ruffler foot.  If you are gathering by hand, you may want to calculate the length of the strips by measuring each line with a measuring tape and then using a 1.5 or 2:1 ratio to determine the length.  Each row as you go up will require less fabric than the one below it.
You will also need to cut two additional pieces for ruffles for the bottom hem of the skirt.  For mine, in addition to the nine that were needed for the rows in the front, I needed to cut two more, one for the bottom front and one for the back.
I used my serger to roll a hem on both long edges of the ruffles. You can also create a narrow hem on a regular sewing machine.  If you make a narrow hem, the strips will need to be cut even a little wider than I cut mine to accommodate for the hem. The width of the hem will determine how much wider to cut the strips.
Now you are ready for the fun part, adding the ruffles to the skirt piece.  I use a ruffler foot to attach mine.
This is how I line up the line on the skirt piece with the edge of the ruffle strip.  I keep them in line with the hinge on the ruffler foot.  This gives me about a 3/8 inch (1cm) allowance from the top edge of the ruffle.
When using my ruffler foot, I always set it to 0 tucks per stitch until I know that I have passed the seam allowance.  This keeps the fabric within the seam allowance flat and makes it much easier to sew the side seam of the dress.
Once I know that I am a few stitches beyond the seam allowance, I stop with my needle down and set it to 1 tuck per stitch. When I get to the mark for the seam allowance at the end of the ruffle, I stop and set it back to 0.
The markings on the ruffler foot tell you how often it will add a tuck.  Zero means that it will not add any tucks at all, 12 means that it will add one tuck every 12 stitches, 6 means one tuck every 6 stitches and 1 means that there will be a tuck for every stitch.  The amount of fabric that will be tucked is determined by how tight the screw at the top of the foot is turned.  Tighter means it will take a bigger tuck, looser means it will take a smaller tuck.  Stitch length plays a big part in the amount of gathering that will go into the ruffle as well.  I usually have to play with scraps a bit to make sure that I have the amount of gathering that I want.
It takes a little practice to learn how to use the ruffler foot. Your two pieces of fabric move through the machine at different rates.  I use my left hand to guide the ruffle and my right hand to guide the piece to which I am attaching the ruffle.
Start with the bottom ruffle and move your way up to the top.  The ruffle at the top should be flush with the top edge of the skirt piece.
There will be a lot of leftover ends to the ruffle pieces hanging over each side of the skirt.  Carefully trim them off.  This will be much easier to do from the back of the piece.  For the bottom ruffle, just extend the line from the side of the skirt.
Pin and then baste them down inside the seam allowance in order to make it easier to sew up the side seams of the dress.
Once the front skirt piece is finished, add a single ruffle to the bottom of the back skirt piece.  To do this, once again, make a mark 3/4 inch (2 cm) above the bottom edge of the back skirt piece, draw your line, attach the ruffle and trim it accordingly.
Once those pieces are complete with ruffles, finish sewing up the dress as the pattern is written using the partial lining option and omitting the hemming steps.
Instead of doing two buttons on each side, I decided to get really crazy and make my own buttons out of polymer clay and just put one large button on each side.
So, there you have it… a fun, cute way to snazz up your next Estherlyn!  Thanks for reading and I  hope that you have enjoyed this tutorial.

Marbella Dress Tour & Giveaway

Hi & thanks for stopping by for the Itch to Stitch Marbella Dress Pattern Blog Hop!

I’ve always loved Audrey Hepburn. I know I’m not the only one. As a teenager she was a great role model – classic, beautiful, charming, graceful, timeless. I love her in this iconic photo wearing that boat neck dress with tulip skirt pegged down to the floor. *swoon*

Lovely, but a little impractical for daily wear. Insert the Marbella Dress by Itch to Stitch Designs.

As I mentioned on Monday’s Post, when I first saw the Marbella Dress I was over the moon for Kennis Wong’s design! I’m sure a lot of it had to do with it’s classic feel and clean lines. I was so thrilled to be able to test such a lovely garment pattern. The Marbella Dress features a wide boat neck, front and back yokes allowing for color blocking, feminine princess lines that allow for a close fit in the bodice, roomy, slightly above knee tulip skirt, functional in-seam pockets and invisible back zipper closure (description from the Itch to Stitch website).

Itch to Stitch Marbella Dress Pattern | JaimeSews

The group of testers and Kennis were so wonderfully helpful through the entire process. Before cutting into our fashion fabrics (mine being this solid blue, slightly textured bottom weight from F&M Fabrics), several of us started with muslins (practice garments) from solid cotton or leftover fabrics to get the fit just right. This pattern has sizing for A/B/C/D cups (I KNOW!) so the bodice fit wonderfully in front right off the bat. However, I did have some pooling of fabric at my lower back. That was quickly remedied by a sway back alteration on the appropriate pattern pieces. This is a common alteration for me on all patterns, one I failed to do (since I skipped the muslining stage) on my Easter Dress and really regret! As you can see in the picture below, the alteration was worth it! No extra fabric, just smooth seams.Itch to Stitch Marbella Dress Pattern | JaimeSews

Another change I made to the pattern was to blend between sizes. This is also common for me as my measurements always do land a little smaller on top than on bottom. At first Kennis and I did not think it would matter since the skirt is so roomy, but after some mystery fitting issues with the first muslin, I cut a larger skirt and attached to the practice garment after resolving the swayback and the correct size skirt made all the difference in the world. Itch to Stitch Marbella Dress Pattern | JaimeSews

I really want to emphasize that these are alterations I have to do every time I sew for myself so it was definitely not the pattern! In fact, the pattern itself was wonderful to work with. Everything fit together beautifully. And I really adored the techniques outlined in the instructions. They made me a better seamstress by walking me through some steps I am usually in too much of a hurry to consider (like trimming the lining pieces slightly to make them turn a little inward so you don’t see the lining peak out from the front of the garment). Little things like that, and more outlined in the instructions, really contribute to a professional finished product! Itch to Stitch Marbella Dress Pattern | JaimeSews

I think this dress has a lot of potential to be drastically different just by changing the fabrics! The fabric I chose is great for fall/winter with a jacket or sweater, but a floral would be great for spring and the yoke and bodice would lend themselves beautifully to color blocking, as you can see in some of the others’ tester versions. So be sure to click around below and follow the tour – you won’t be sorry!

ALSO – enter to win your own Marbella Dress pattern here!

*The Marbella Dress pattern was given to me in exchange for sewing and testing the fit and pattern details. Opinions are all mine. This post does contain affiliate links*

Wed, October 15:
Ann from The Pattern Studio by 1 Puddle Lane
Lindsay from Design by Lindsay

Thursday, October 16:
Debbie from Stitch It Now
Jaime from Jaime Johnson

Monday, October 20:
Darcy from Ginger House Designs
Stacey from All Sewn Up by Stacey

Tuesday, October 21:
Diane Guess Post on Itch to Stitch
Ajaire from Call Ajaire