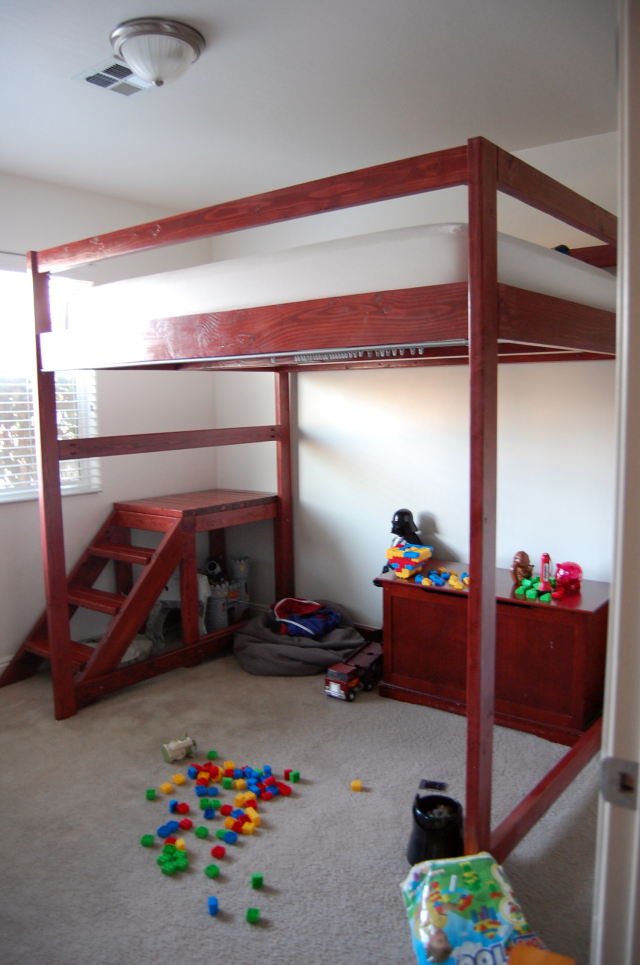
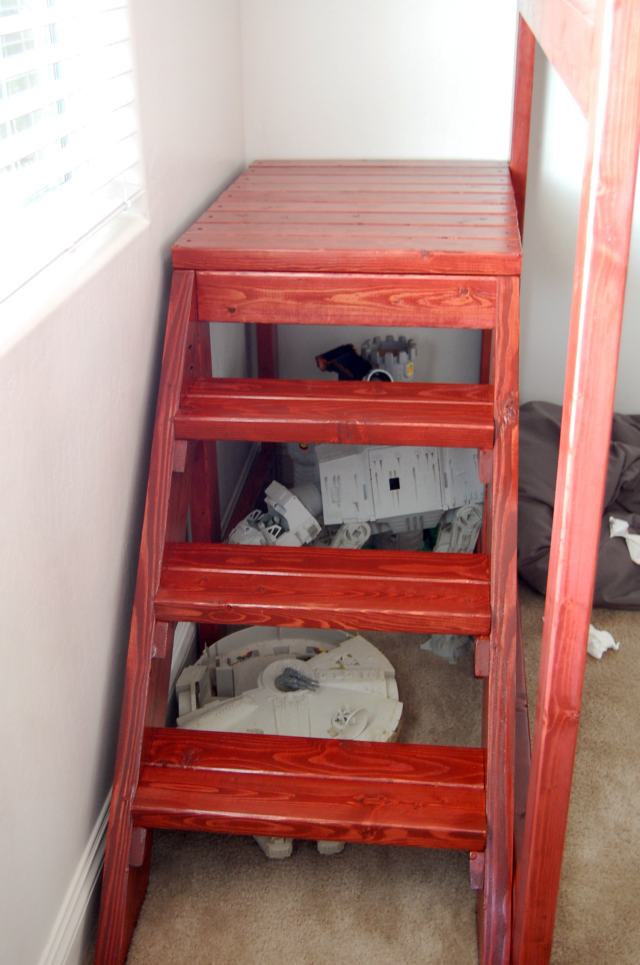
The last couple of months have been busy with some pretty big projects. I’d be lying if I didn’t admit I look forward to a little down time and some simple projects before I take on some like this again, but I couldn’t be more thrilled with the results of all the time, problem solving and love my husband and I put into our son’s new Loft Bed.
 We got the plans FREE from Ana-White.com, using the Camp Loftbed with Stairs, Junior Height plans as our starting point. Our son’s mattress is pretty new and we didn’t want to have to purchase a twin size to fit the plans so I was very happy to find user Pammylaine had included measurements and cutting instructions for a full size mattress in the comments below the plans (you can see her finished loft bed here). We decided that though the loft bed would be wider to accommodate a full sized mattress, we liked the idea of having the full length of the platform + stairs = the width of the bed (instead of making the platform the width of the bed and having the staircase stick out beyond).
Since the platform was part of the foot board in the original plans, we had to get creative and build the platform/stairs as a separate unit from the bed itself. We did not, however, account for the stability the all-in-one platform/foot board provided so changing that, plus adding width and height and breakdown hardware instead of straight screwing the bed together, we found that the bed itself was pretty, er…wobbly. To fix this, we decided to add another 2×4 to the bottom of the foot board to match the back side and head board pieces. We then added a 2×4 to the center of the bed frame, which also supported the mattress better by allowing the slats to sit on each side cleat and the center board. Finally, we screwed the foot board to the stairs/platform and bolted the whole thing to the studs in the wall. This thing is now SOLID.
 We also had some issues with the staining. Well, not the staining so much as with the top coat. We were aiming to match the other furniture in the room (one item being the toy chest you can see in the first picture) and I was pretty excited to find that Minwax Sedona Red matched pretty closely. However, when I added the quick drying polyurethane, it started to strip some of the stain color and make it blotchy in other areas. Being that we’re beginners, I’m not entirely sure what happened there, but fortunately, the boards most effected are up top where my sweet boy sleeps and not many people will see it.
The underneath is so fun – even I enjoy spending time in his room! In fact we’ve moved our home school sessions in there and he sits in his perch while I read, coming down the stairs when different activities require his presence. Even though we had other issues in the process not mentioned in this post, now that it is in his room and we see how much he (and the rest of us) enjoy it, I am really happy we persevered. I was thinking of building our daughter a trundle or day bed when time came for her to get a big-girl bed, but she definitely loves this loft bed, even though she can only reach to the first ladder rung after the platform. We might be building another one in the future!
 This Loftbed is part of a room makeover process that started last year! We are moving toward a Star Wars theme and have ordered some Star Wars fabric to make fabric “walls” to enclose the bottom area. You may notice the curtain rod attached to the front side of the bed. I’ll be sure to share the view when the curtains are up and we make more progress!
